Step by step guide on how to set up solar power at home
Clean energy is gaining ground rapidly just when greenhouse gases and carbon emissions are immensely hurting our ecosystem. Worldwide, two-thirds of solar power capacity have been installed since 2011. Fortunately, India has kept pace with the Rapid development of clean solar power. Reports indicate that solar power generation in India increased by a whopping 86% in 2017.
It is now ideal to use solar power not only in commercial units but also for residential ones. The costs of installing a solar power unit have steadily dropped, but you can always try the DIY option to keep it within your budget. However, if your budget cannot afford it and you need to go for a loan, then calculate your mortgage with the help of a Mortgage Calculator.
You can save money by setting up a solar with solar photo-voltaic (PV) system yourself by reading this simple guide to set up solar power. Here is an in-depth look at how you can build and install a solar power unit for your home:
Step-by-step guide to set up solar power unit
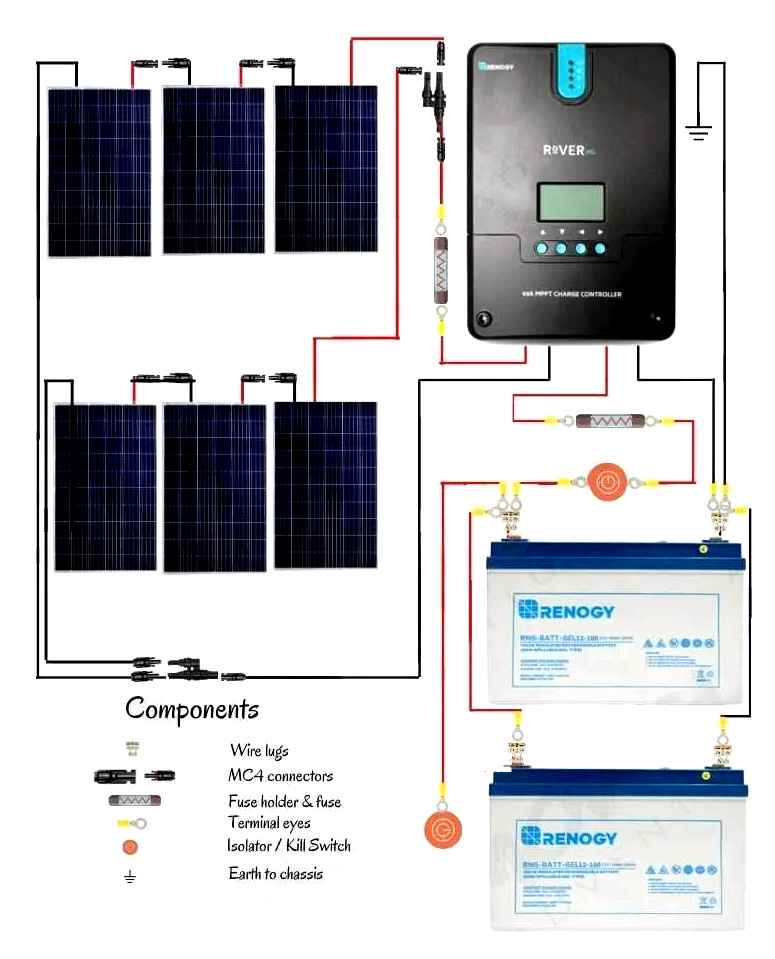
It all begins with gathering the basic ingredients of a solar power unit. You will need four major items – solar panels, charge controller, inverter, and a battery pack. In addition to these items, you will require a breaker, meter, MC4 connector, and fuses among other things. Keep in mind that it is essential to read the solar panel module instructions.
Before setting up a solar panel, it is crucial to choose a solar panel set that will be sufficient to run the appliances you want to operate. This is where the use of a solar panel calculator is seen. This Smart tool will instantly let you know the number of solar panel plates you need to install so that the appliances could be run without any trouble
Step 2: Calculate your power load
Before getting to the solar installation task, it is crucial to sum up the power that you use at your home. This isn’t rocket science. All you have to do is to note down the home appliances that you use on a daily basis, which include television, lights, fan, and so on. Next, add the time for which these appliances run in a day. Go through the specification chart in your household electric appliances to check their usage duration or run time, and their power rating.
Now calculate the ‘Watt-Hour’ by multiplying the runtime of an appliance with its power rating. Follow this step for each electrical device, then sum up the individual watt-hour numbers to get the grand total. You can also simplify this calculation by using an online off-grid load calculator.
Passive Solar Heating
Passive Solar Heating is most cost-effective way of warming buildings and the goal of any passive solar heating systems is to capture and store the sun’s heat within the buildings materials and then release the heat during periods when the sun is not shining.
While at the same time the buildings elements are absorbing the suns heat for later use, there should also be enough solar heat available for keeping the living space comfortable and warm for normal daily use.
We have all seen that when an object absorbs sunlight it gets hot and we can put this to good use by allowing sunlight to pass through a window and be absorbed by the building striking directly and indirectly the thermal mass materials in the house, such as masonry floors and walls before being converting into heat.
Houses heated by passive solar energy have energy efficient Windows that face south, so they absorb as much heat as possible from the sun. Once the heat has entered the building, various techniques come into play to keep and distribute it.
While direct sunlight through south facing Windows can heat up a building quickly, it is much more difficult to control without the aid of a thermal mass storage wall. The thermal mass of buildings is a common concept in passive solar design. All materials can store heat to some degree so making use of heavy mass materials in the walls, floors, and ceilings gives them a higher thermal mass or heat capacity.
For example, concrete and masonry are good heat absorbers so the floors and walls can be constructed from these materials. In the hot summer time, any excess heat will be absorbed by these thermal masses to help cool down the building. Also painting the floor and walls in darker colours will help absorb the heat better.

Once the heat is in, a well insulated and air tight building design helps prevent heat loss and allows the solar heat to provide more of the heating needed. Then the crucial component of the passively heated building is in the window positioning and design and passive solar energy makes good use of this. While normal glazed Windows let heat escape, high performance Windows with insulated frames and spacers, low emission ratings and multiple glazing filled with inert gas or vacuum fills, can help reduce heat loss back through the Windows by over 50 per cent in most cases.
Passive Solar Heating of a Building
Conservatories are also an effective means of bringing thermal energy into houses by means of conduction through a shared mass wall in the rear of a sunroom or by using vents that allow the air between the sunroom and living space to be exchanged by natural convection.
A brick chimney between a sunroom and the living room can also act as additional thermal mass. A south-facing home having an attached conservatory can in the hot summer months, use of blinds, curtains or awnings to block the sunlight and prevent the building from overheating.
But as well as large south facing Windows and high efficiency Windows, modern passive solar thermal designs use buildings with high (R-20) levels of wall insulation and air-tight construction to keep the heat in, when it is cold outside and keep the interior cool when it is hot outside. With the heat contained, often a simple ceiling fan is all that is required for the heat to be distributed around the building.
Passive Solar Cooling
Passive Solar Cooling is another use of solar energy and is the exact opposite to passive solar heating. As its name suggests, passive solar cooling is more about reducing heat build-up rather than about taking it away. Cold is nothing more than the absence of heat and most of us associate cooling and air-conditioning with self-contained electromechanical HVAC devices connected to an electric power source, but the need for air conditioning in the building during the hot summer months can be greatly reduced or even eliminated by using passive solar cooling.
Passive cooling systems have the same basic components as passive heating systems, but work in a different manner. Producing cooled air by making use of solar energy may seem a bit odd at first sight because we tend to view the sun as source of heat. However, with passive solar building designs and the use of the right materials it is possible to remove heat thereby cooling our homes and buildings as well as heating them using the power of the sun.
The obvious way of shading a building is with the use of shutters, awnings, curtains and landscaping with trees, while still admitting a significant amount of indirect light. From a passive solar viewpoint, the most effective method of shading is on the outside of the building using overhangs which block the sun during the summer months but allow sunlight to enter the building during winter.
When designing with passive solar cooling in mind, heat from solar radiation and heated air should be kept from reaching the building. Natural ventilation relies on the natural airflow and breezes through Windows on opposite sides of the building to reduce the need for mechanical cooling when the building is occupied. Also cross ventilation will help distribute the heat more evenly around the building keeping it cooler.
Passive solar cooling techniques include carefully designed overhangs and using reflective coatings on Windows, exterior walls, and roofs. Another way to achieve passive solar cooling is to combine shading with natural ventilation. We can design or modify buildings to use this moving air to cool the building so that the heat of the sun creates convection currents which draw cool air into the building from outside as heat rises, and cool air sinks helping to reduce the inside temperature.
Solar energy may be excluded from the interior of a structure by building walls that have good thermal insulation or cladding. Thermal insulation in walls can keep heat out of a structure during the summer and keep heat in during the winter. Expanding foam can also be used which is pumped into the wall cavity, which then fills the gap and insulates the home.
Passive Solar Energy Conclusion
The sun is free, it only makes sense to use it so by using passive solar energy design to heat and cool your home you can be both environmentally friendly and cost effective. The term “passive” indicates that no additional mechanical equipment is used so any solar gains are brought in through Windows with the minimum use of electrical pumps or fans to distribute the heat or produce an effect cooling. This results in a building that responds to the environment.
Heating and cooling with passive solar energy is not as easy as you might think. Capturing the sunlight and putting it to work is difficult because the solar energy that reaches the Earth is spread out over a large area. The sun does not deliver that much energy to any one place at any one time. The amount of solar energy an area receives depends on the time of day, the season of the year, the cloudiness of the sky and how close you are to the Earth’s equator.

But a well designed passive solar house will have comfortable, even temperatures all year round and make good use of natural light. It will therefore require less energy to heat, cool and illuminate than a conventional house. Hence it will also create less greenhouse gas emissions helping you save money and the environment.
Passive solar energy requires buildings to be located and designed so that they interact with the environment and climate in a positive manner so a passive solar home requires careful design and siting, which will vary by local climate conditions. If you are considering passive solar design for a new home or a major remodel, consult an architect familiar with passive solar energy techniques.
To gain a better understanding of how “Passive Solar Energy” works, or to obtain more detailed information about passive solar design and architecture, then Click Here today to get your copy from Amazon of one of the top books about passive solar energy concepts and practical ideas and ways you can use to heat and cool your home just by using passive solar designs.
Step 5: Test Your Electronics
Before we move on to do anything else, we want to make sure that the parts are working. You can test your holiday lights, LEDs, buzzers, or motors by connecting each of them directly to the battery pack. LEDs are polarity sensitive, which means the test will not work unless you wire the LED legs (two wires on the LED) to their polarity. Generally, the longer leg on an LED is positive and the shorter leg is negative. In this case, the longer leg of the LED will connect to the red wire from the battery pack and the shorter leg to the black wire.
For this step, let’s explore what we mean when we talk about series and parallel circuits. When should one use series, parallel or both circuit connections?
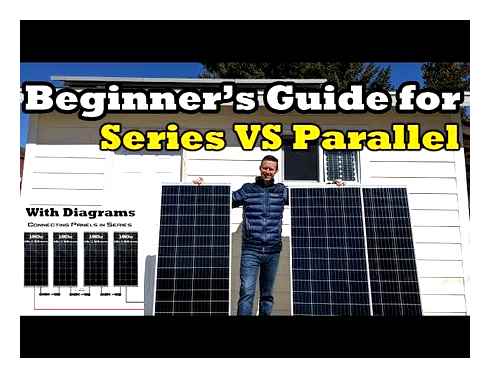
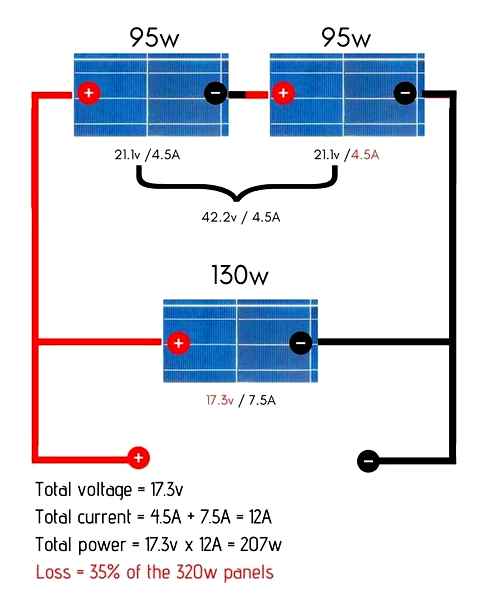
When you connect a circuit in series, the voltages of each component are added together and the amp stays the same. For example, look at the battery packs and the solar panels in the image above. They are connected in series. Each battery pack has an output of about 3 Volts. When you combine them by connecting a positive (red) wire from battery pack A to a negative (black) wire from battery pack B, they will output 6 volts in total. However, the amps between the two battery packs do not add up. They stay the same as a single battery pack. Series connection is needed when you have an output that needs more voltage to operate than what one battery pack can provide.
When it comes to outputs (lights, motors, or buzzer) of a circuit in series, the voltage needs are increased. It will need the combined amount of voltages from both components in order for both components to operate properly. Otherwise, the electricity will take the easiest path or go to only one component. If one light is burned out, it will break the circuit and stop the other lights in the series connection.
Step 7: Series and Parallel Circuits: Parallel Connection
For Parallel circuits, the current/amp will add up from the two components that are connected. The voltage in this case will stay the same. A parallel circuit is great for cases where you want to keep the voltage the same to allow your output to stay on for longer without burning out.
For parallel connection, connect the positive (red) wires from both power sources together, and then to the output. Do the same with the negative wires (black).
When you wire an output (light, motor, or buzzer) in parallel (refer to the third pictures), the battery will drain faster since there are three difference outputs connecting in parallel drawing current from the one battery. However, the benefit is that if one light is burn out, it does not break the entire circuit. This means that the other light will still stay lit.
Step 8: Make a Switch
A switch is basically a safe and intentional breakage or interruption in a circuit. Use it when you want to turn something on or off.
Grab a piece of index card and fold it in half as shown. Apply aluminum tape to one side of the index card. Make sure the tape overlaps the edge of the index card, then fold it around to cover the inside part of the index card. Repeat this step on the other side of the index card.
Step 9: Switch Wires
Use clear tape to tape down a wire on each side of the index card. Make sure the wires are on the outside as shown in the pictures.
Connect the switch by breaking one wire, either the red (positive) or negative (black). Connect it inline with the wire. The circuit is complete when the aluminum tape on the index cards touches. That will turn on the outputs. If the cards do not touch, the circuit is open and does not allow electricity to flow to the outputs.
Built-in Financing through a Mortgage
You can include a solar energy system as part of your mortgage when you’re building a new home. In this case, the additional monthly payments that you make will be offset by the savings on your electricity bill. This is helpful because instead of making two separate payments. one for your home and one for your solar panel system. you only have to make one.
When you build a house, the land appreciates in value. On the other hand, the house’s value depreciates. In this case, adding solar panels can be a good way to increase the value of the house. According to National Renewable Energy Laboratory, each 450 in additional energy savings from solar panels contributes to a value of 20 in the value of your home. This figure is dependent on a few factors:
- The location of your home. Depending on how active the solar market is in your area. The value added to your property will vary.
- The size of your solar panels. Property value is directly proportional to the number of panels installed
- The size of your home. Larger houses will receive higher value boosts but, these won’t seem too high when compared to the actual house price.

Build a Solar friendly home
Building a new home while keeping in mind that you want to install solar panels has some benefits that cannot be overlooked:
- Your home can be built in a south-facing direction. This is important because it allows your solar panels to capture maximum sunlight.
- Your roof can be designed to accommodate maximum solar panel arrays.
- The venting and other obstacles can be placed keeping in mind the position of the panels.
- Design your landscaping so it will eliminate as much shading as possible.
Increase the shelf life of your roof
A question we get asked quite often is “will the solar installation process damage my roof?” The answer is absolutely not, in fact, solar panels actually protect your roof. Here’s how:
- Solar panels are attached to mounting rails, not the roof surface.

- These rails are connected to the shingles. installation to secure the rails are sealed to avoid any leaks.
- Solar panels act as an extra layer of protection on your roof that helps prevent damage from harsh weather conditions like hail storms.
In case you’re not a fan of drilling holes in your roof, a ballasted solar energy system can also be installed in less windy areas.
Building a new home with solar panels isn’t hard but it does require some persistence, forward-thinking and legitimate caring for your home.